Nx Witness User Manual
The Timeline itself and the scrollbar respond to a broad set of mouse wheel, mouse click, and button commands.
Click on the desired date and time on the Timeline to select it. If archive exists at that point, the time marker is placed at that point. If not, the time marker jumps to the beginning of the next recorded segment. Playback will begin in real time if playback is active. If playback is paused, the time marker position and content remains static until you click elsewhere on the Timeline.
If the desired point in time is not currently visible there are several ways to locate it.
To scroll the Timeline
•Click-and-drag the scrollbar back or forth to the desired position.
•Use Ctrl+mouse wheel over the Timeline or scrollbar.
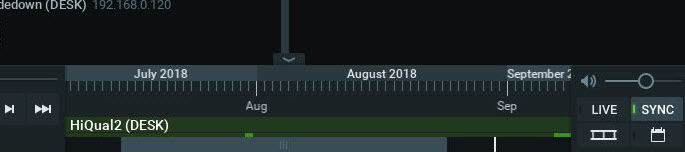
To scale the Timeline
Scaling is centered on the cursor unless the cursor is at the very end of the Timeline, in which case scaling is anchored to that end point. The scrollbar scales with the Timeline to indicate how much of the total Timeline is currently visible on screen. The white time marker indicator shows the location of the time marker in relation to the current Timeline display. For example, in the left illustration below, the scrollbar is small because only a small portion of the total Timeline is visible, and the scrollbar overlaps the time marker indicator because the time marker is currently visible. In the right illustration, the scrollbar is large because a large portion of the total Timeline is visible, and the scrollbar does not overlap the time marker indicator, because the time marker (which is still at 9/18/2018) is not currently visible.

•Use the mouse wheel over the Timeline or scrollbar to zoom in (smaller time increments) or out (larger time increments).
•Click on the scale buttons to zoom in ( ) or out (
 ) by 10%. Double-click to zoom by 20%.
•Click and hold the scale buttons for rapid zoom.
•Click in the scrollbar background area to scroll "screen by screen" in increments the size of the current display. Double-click to scroll by two screens.
•Double-click on the scrollbar to zoom out to the maximum available view.
To control playback speed
Press Space to toggle between play and pause.
Press  to play at actual speed.
Press  to pause.
Press  or Ctrl+Right Arrow to fast forward. Available speeds are 2x, 4x, 8x, and 16x.
Press  or Ctrl+Left Arrow to rewind. Available speeds are -2x, -4x, -8x and -16x.
Press  or X to jump forward to the next recorded chunk.
Press  or Z to jump backwards to the previous recorded chunk.
When paused
Press  or Ctrl+Right Arrow to jump to the next frame.
Press  or Ctrl+Left Arrow to jump to the previous frame.
Press or X to jump forward to the next recorded chunk
Press or Z to jump backwards to the previous recorded chunk
If you press a rewind button while in Live mode, the mode will switch to archive playback. If you press a fast forward button while viewing archive, display will switch to Live mode if the current time is reached.
Use the Speed Slider to temporarily change playback speed. This is helpful for previewing images that bracket the current position. Drag-and-hold it to the right for fast forward or to the left for fast rewind, also in 2x, 4x, 8x, and 16x increments. Release to return to 1x speed (during playback) or 0x (when paused). If playback is on Pause the speed slider has increments 0.25x, 0.5x, 1x, 2x, and 4x.
Remember, when SYNC is enabled, the speed slider and LIVE button apply to all items in layout. When SYNC is off, the speed slider and LIVE button apply only to the selected device.
To select a time segment
•Click-and-drag on the Timeline
•Right-click on the Timeline and choose Mark Selection Start (shortcut [). Right-click again and choose Mark Selection End (shortcut ]).
The selection will be highlighted with blue shading. Once a segment is selected, you can click-and-drag the edges to adjust its length. You can also use the context menu to select Clear Selection or Zoom to Selection. If you click outside the selected segment the selection will be lost.