Nx Witness User Manual
An Email service must be configured for the System to be able to send Emails (see "Mail Notifications").
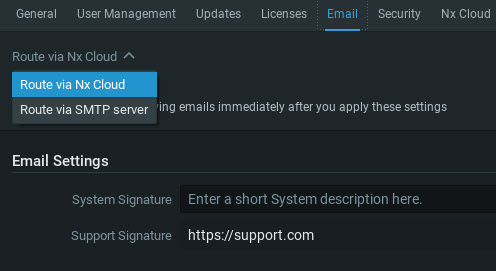
Nx Witness provides a Cloud based solution to directly push Email notifications to Users or a private SMPT service can be configured to provide delivery of Email notifications using an authorized Email account and corresponding password.
 Note: Review the terms and conditions published by SMTP Email service provider to ensure the account is not rate limited or employing a rolling password that could delay or prevent Email notifications from being sent.
To Enable the Cloud Email Service
1.Open Main Menu > System Administration > Email tab.
2.Select Route via Cloud in the pull-down menu.
3.Enter a signature and support URL for the notification messages.
4.Click Apply to commit changes and keep dialog open, or Click OK to save and close the dialog.
Message delivery will immediately be enabled.

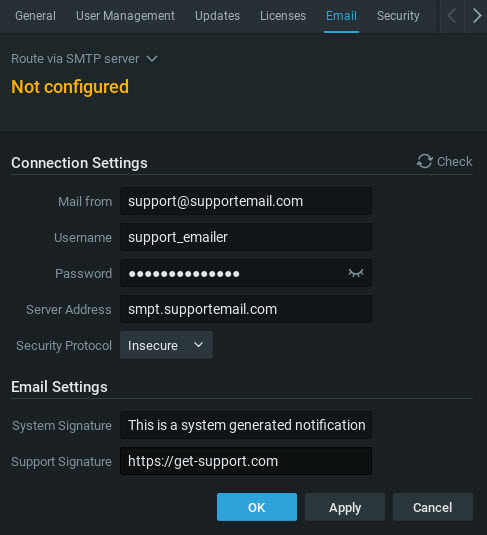
To Configure a SMTP Connection Settings
1.Open Main Menu > System Administration > Email tab.
2.Enter the following:
•Mail from– Email address to use for outgoing mail.
•Username – Email or login of the outgoing account on the Email server.
•Password – Password for the outgoing Email account.
•Server Address – Email Server address or Gateway.
•Security Protocol – Choose Secure connection using TLS, Secure connection using SSL, or an insecure connection.
•System Signature – User defined System description that will identify the System in outbound Emails.
•Support Signature – Support website for the Nx Witness installation.
3.Click the Check button to test the Email Server connection.
4.Click the Apply button to save changes to the Email Server configuration.
